It’s National Needlepoint Month, so I thought we’d celebrate by taking a closer look at one of my all-around favorite stitches – the reversed mosaic stitch!
The reversed mosaic stitch is an incredibly versatile little stitch and I find myself using it all the time! I know you’re gonna L-O-V-E it, too!
Before we go any further though, let’s review the mosaic stitch. Remember, each mosaic stitch unit consists of three stitches – a tent stitch, a longer 2 x 2 diagonal center stitch, and another tent stitch. Here’s a picture for you…
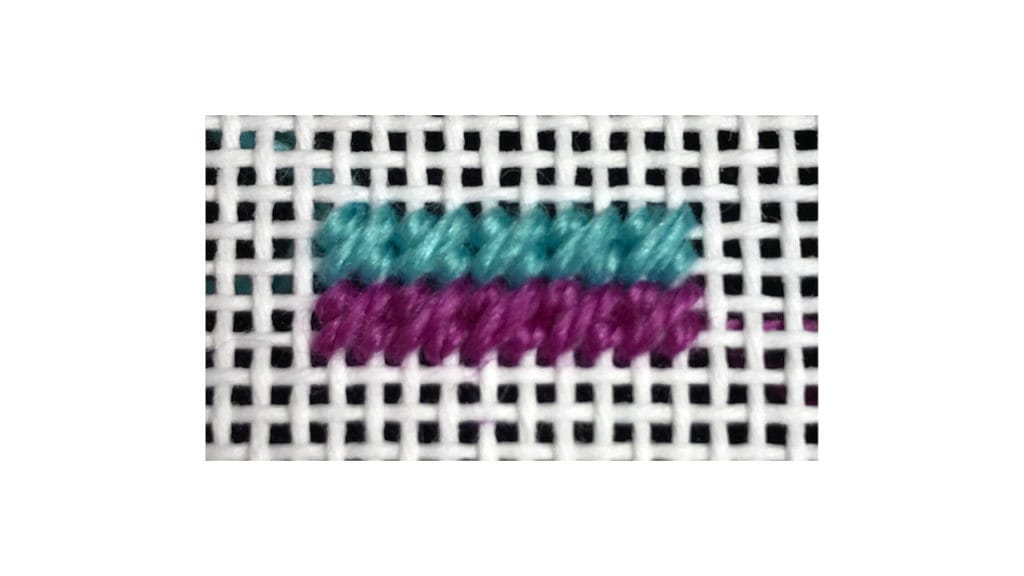
Now – back to the reversed mosaic stitch.
I prefer to work the reversed mosaic stitch in two steps. It’s easier to keep track of what you’re doing when you execute it this way, in my opinion. I usually begin on the right side of the area I’m covering with the stitch. Just follow the numbers on the diagram below and you’ll be golden!
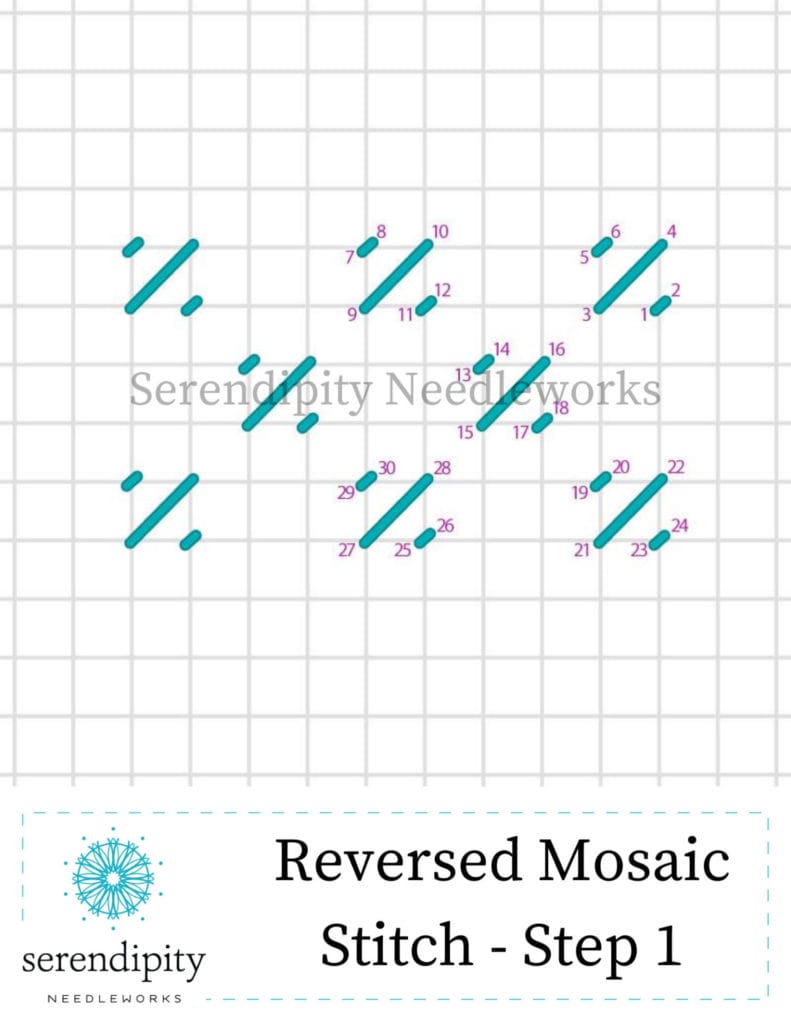
And when you finish step one, you’re ready for step two.
Here’s the diagram for it:
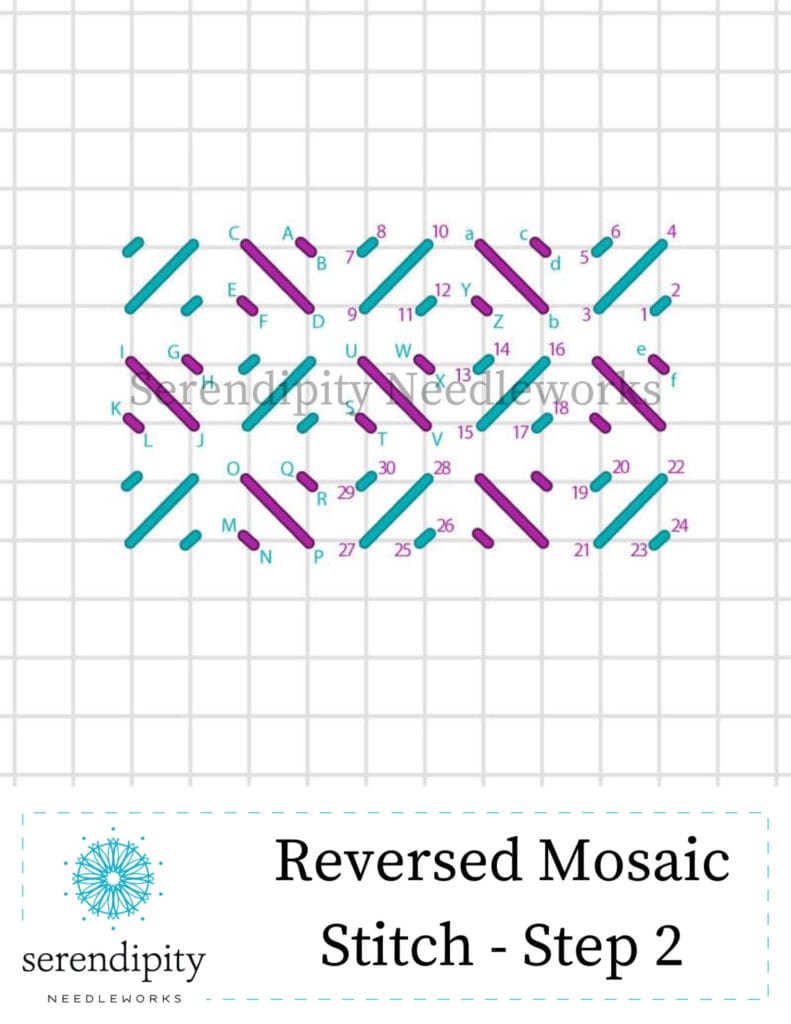
All you have to do is simply go back and fill in those gaps from step one, reversing the slant of the stitches in each unit. In other words, the stitches executed in step one slant to the right and the stitches worked in step two slant to the left. Easy peasy, right?
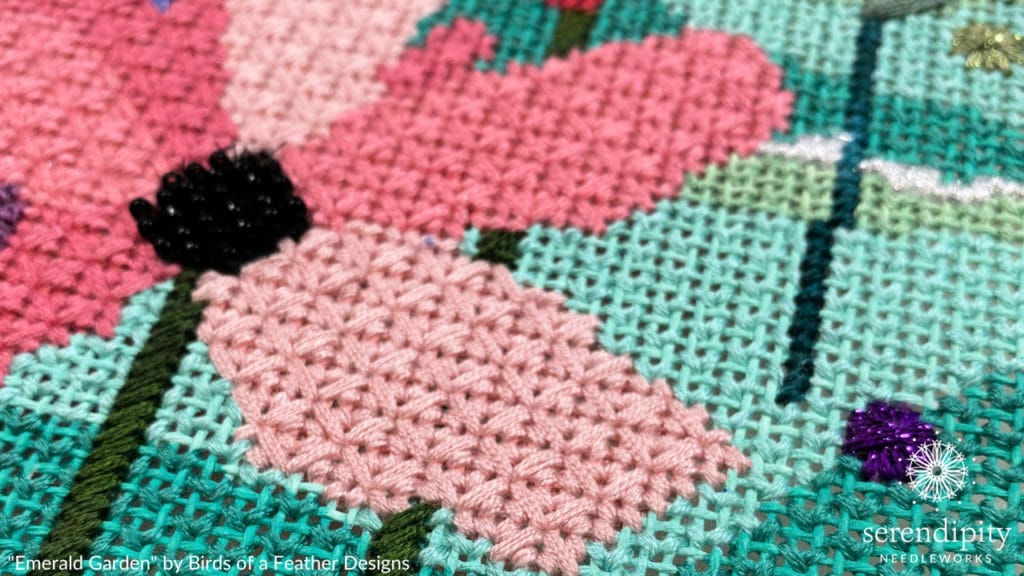
The reversed mosaic stitch can be used to add visual interest to a variety of design components…
but three of my favorite ways to use it are on lawns, brick or cobblestone sidewalks, and cozy blankets.
Since it’s a smallish-size stitch, you don’t need a very large space to establish the pattern, but you do need more room than you would for a standard mosaic stitch. Remember, if you can’t get three repeats of the pattern in the designated space, the stitch is too large. You want to be able to get 3 horizontal rows of at least 3 stitch units into the space.
Now, let’s take a closer look at those uses for the reversed mosaic stitch.
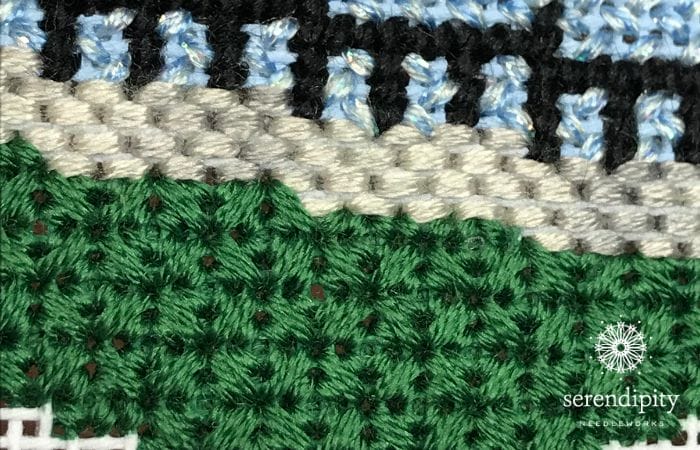
When utilizing this stitch to create a beautiful grassy area (including golf courses!), use a rich green silk or cotton thread. Soie Cristale from the Caron Collection in color 5121 (jade green) is a wonderful option. Be sure to use a laying tool when working with Soie Cristale since it’s a stranded thread. I like to use 4 strands on 18 mesh canvas and 6 – 7 strands on 13 mesh canvas when my goal is to achieve full coverage. Adjust the number of strands according to the kind of coverage you want to achieve on your canvas.
Moving right along, if you have a canvas that includes a cobblestone or brick sidewalk or street, you can use the reversed mosaic stitch.
You probably already know that I really like Watercolours, another Caron Collection thread. I especially like it for stitching bricks or stones since it has a rougher texture than many of the over-dyed threads. Some of my favorite colors of Watercolours for stitching bricks and cobblestones are Cedar (#136), Clove (#114), Copper (#137), Mahogany (#174), and Old Brick (#306).
And finally, if there’s a blanket on your canvas, you can use the reversed mosaic stitch to create a cushy coverlet.
Planet Earth Wool, Silk and Ivory, Very Velvet and Petite Very Velvet are all luxuriously decadent options. The color palettes available in all four of these threads are absolutely gorgeous and you’re sure to find the perfect match for your project. My best suggestion is to use Very Velvet and Silk and Ivory on 13 mesh canvas and Planet Earth Wool and Petite Very Velvet on 18 mesh canvas. (Planet Earth Wool will work on 13 mesh canvas, too, but I prefer using it on 18 mesh canvas when I’m aiming for full coverage.)
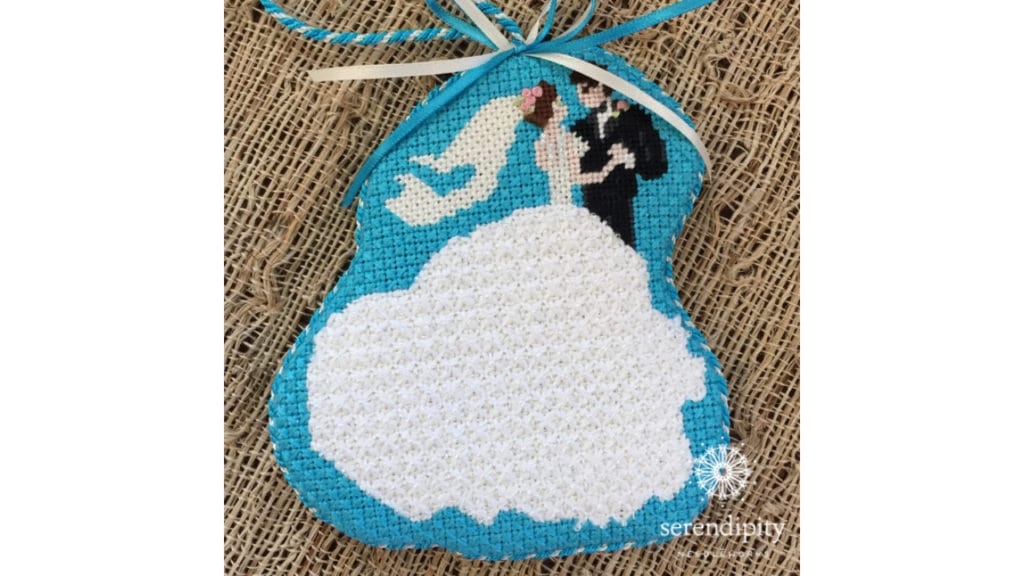
The reversed mosaic stitch is also a terrific option for backgrounds, like on the ornament in the picture below. 😉
Alrighty, my friend – that brings us to the end of our spotlight on the reversed mosaic stitch. There’s a new episode of Needlepoint TV™ over on our YouTube channel, too, so be sure and check it out. I’ll show you how to actually do the reversed mosaic stitch. (And if you’re not already subscribed to Needlepoint TV™, you might want to do that while you’re there. That way, you won’t miss out on any new episodes. Just click the red subscribe button and you’ll be set.)
If you decide to use the reversed mosaic stitch on one of your canvases, please share a picture on social media. (Include the hashtag #serendipityneedleworks or tag me @serendipityneedleworks so I can find your picture.) You just never know when you might see your project center stage on my Instagram or Facebook posts. 🙂
Until next time, happy stitching…
XOXO!






Something new for me to do yay me.
I can’t wait to hear how it goes, Jean… keep me posted! 😉