This week, we’re going to take a wee break from looking at needlepoint stands. Instead, we’re exploring the rice stitch. It’s one of those versatile stitches that you can use in a variety of places on your needlepoint canvases. It makes a terrific border. Some people even use it as a background stitch! The rice stitch is a member of the crossed stitch family. There are oodles of variations of this stitch.
Some other names for the rice stitch are
- the crossed corners stitch
- the boss stitch
- the squared boss stitch
- and the William and Mary stitch
There are two steps to working the rice stitch.
I’m sharing my diagram with you here so that you can give it a try for yourself. 😉
The first step is to work a large cross stitch over three canvas intersections as you see in the diagram below.
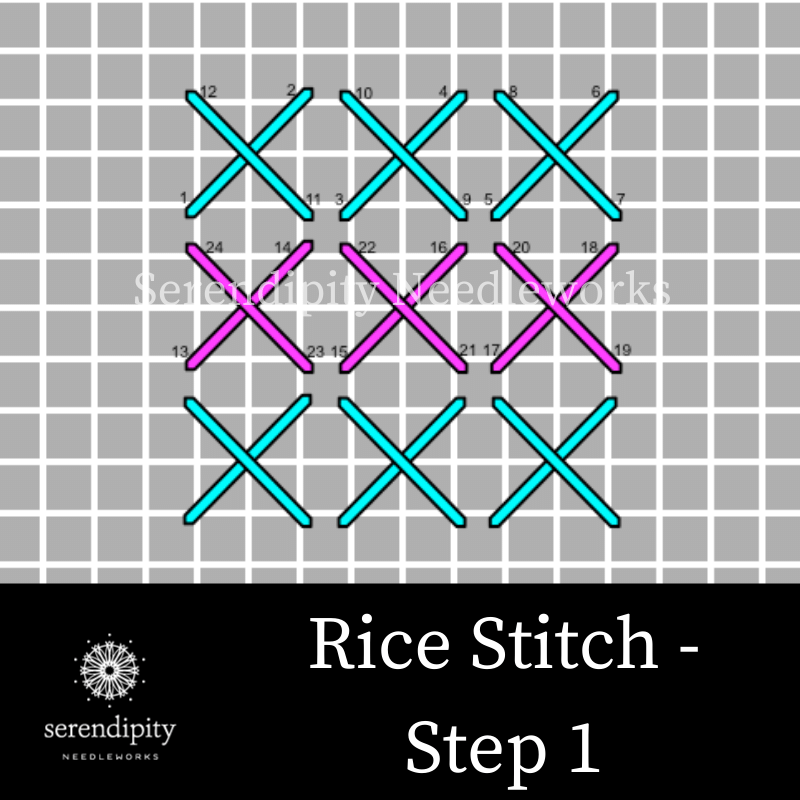
You may also adjust the size of the cross-stitch so that it lays across 2, 4, or more canvas intersections.
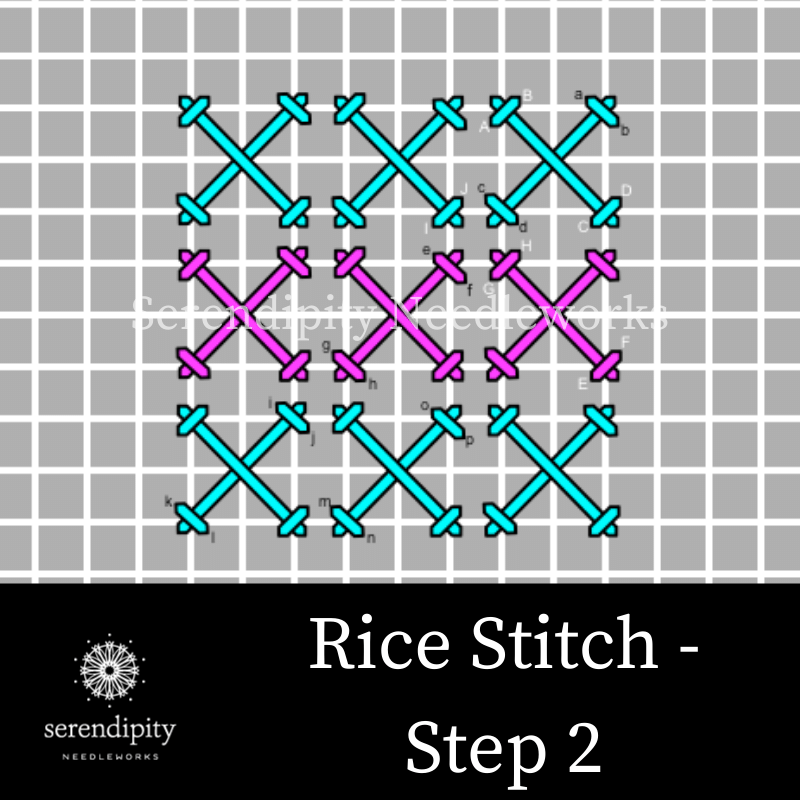
The second step is to work the tent stitches over the four cross stitch legs to form the top layer of the stitch.
Here’s the diagram for you…
You can employ the rice stitch for a number of different design components on your needlepoint projects, including
- clothing details
- architectural details
- snow-covered shrubs
- as a filling stitch
- borders
- backgrounds
There are lots of thread options when using the rice stitch on one of your projects.
For example, if you choose to use it for a snow-covered shrub, you could use Watercolours and Kreinik #8 Fine Braid.
Begin by work the large cross-stitch in the hand-painted thread and then work the small tent stitches in the metallic braid.
And the rice stitch looks super cool when you use a multi-colored thread for the whole stitch (think fancy garments!).
If you’d like to get some helpful tips for how to use multi-colored threads on your projects, be sure and check out this week’s episode of Needlepoint TV™.
Alrighty, my friend, that’s all for now. If you decide to use this fantabulous stitch on one of your projects, please let me know.
And I’d love to see a picture, so if you post one on social media, be sure and tag me (@serendipityneedleworks) or use our hashtag #serendipityneedleworks.
You might just find your picture featured on my Facebook or Instagram feeds. 😉
Have a terrific rest of your day and, until next time…
Happy Stitching!
XOXO!! ❤️


