
Starting a new thread can be soooo confusing! If you find yourself wondering where to start or how to anchor your thread, then you’re in the right place, my friend! I’m going to share a few of my favorite tips with you here today. Ready to dive in?
The Waste Knot
One of my favorite ways to anchor your thread requires a knot – but not the kind you leave in.
Waste knots are an especially good way to start a thread if the thread you’re using is slippery. Your stitches need to be small enough on the back of your work to secure the tail in place. (Think basketweave, cashmere stitch, mosaic stitch, etc.)
Here’s how to use a waste knot to anchor your thread.
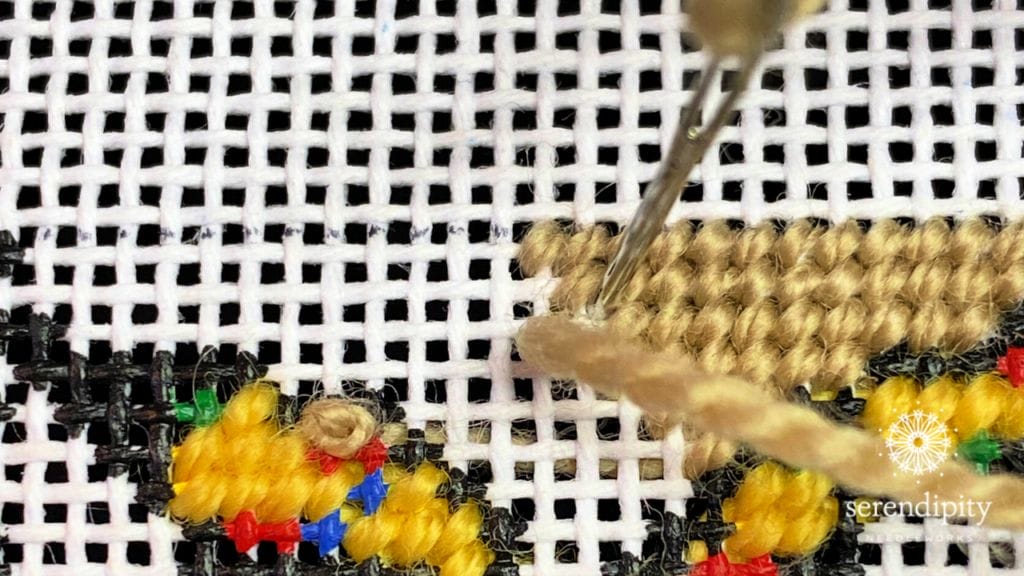
- Insert your needle down into the canvas about an inch away from where you want to begin stitching. Your knot should be on the top (or right side) of your canvas and in line with your stitching “path”. Be sure and trim off any fuzzy tails so they don’t get caught in your stitching.
- Bring your needle to the front of your canvas (on the right side) where you want to place your first stitch.
- Begin stitching toward the knot. You’ll notice that you’re stitching over some of your thread on the backside and that’s what is anchoring your thread in place.
- Right before you get to the knot (maybe one or two stitches before), clip the knot off and toss it in your ORT jar. The tail will pop through to the back and you can keep stitching. 🙂
The Pin Stitch
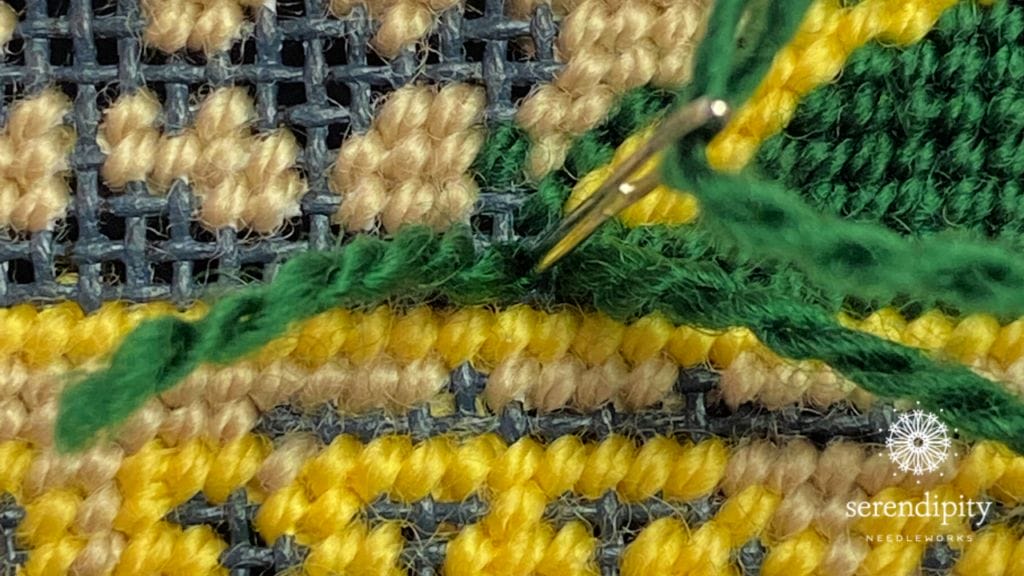
A Pin Stitch is a tiny backstitch taken over one canvas thread, either horizontal or vertical. It’s a terrific option if you’re working in tight spaces or if the decorative stitch you’re using covers a lot of canvas threads. (Think Scotch stitch or balloon stitch.)
Here’s how to secure your thread to the canvas using a pin stitch.
- Insert your needle into the canvas from the front, leaving 1” – 1.5” tail. The tail should hang vertically.
- Hold the tail in place with your non-dominant stitching hand and bring your needle to the front of the canvas one thread above the tail.
- Next, take the needle back into the hole of the canvas mesh where you first began, piercing the working thread with your needle.
- Pull the stitch snugly, giving it a gentle tug to lock it into place.
- Clip the tail flush with the surface of your canvas, taking care not to cut any surrounding stitches.
- Begin stitching. 🙂
Of course, there are other ways to anchor your thread (and we talk about those in Needlepoint Made Easy), but these two options will work in a multitude of situations.
For a demonstration of how to anchor your thread in the middle of a row, be sure and join me this afternoon for a brand new episode of Needlepoint TV – over on the Serendipity Needleworks Facebook page at 3:00 p.m. CST. (And if you want to get a notice every week when we’re about to go live, be sure and click here to add your name to my weekly email list.)
Alrighty, that’s all for now, my friend.
Until next time, happy stitching!
XOXO!


