
Hello, lovely…
How’s every little thing with you? Splendid, I hope! June is off to a terrific start here in Tuscaloosa. I’m finally getting around to spring cleaning the porch. (I’ll share a picture with you on Instagram just as soon as I finish.) I can hardly wait to be able to take my needlepoint out there on the swing. I’m working on a belt for Rick (shh – it’s a surprise!) and I just stitched one for my nephew, Cameron. (Do you see a pattern beginning to emerge? Tee hee!) I like to use the binding stitch on the edges of belts because it adds such a nice finishing touch.
And since I’ve had some requests for how to do the binding stitch, I thought it would make the perfect blog post topic for this week…
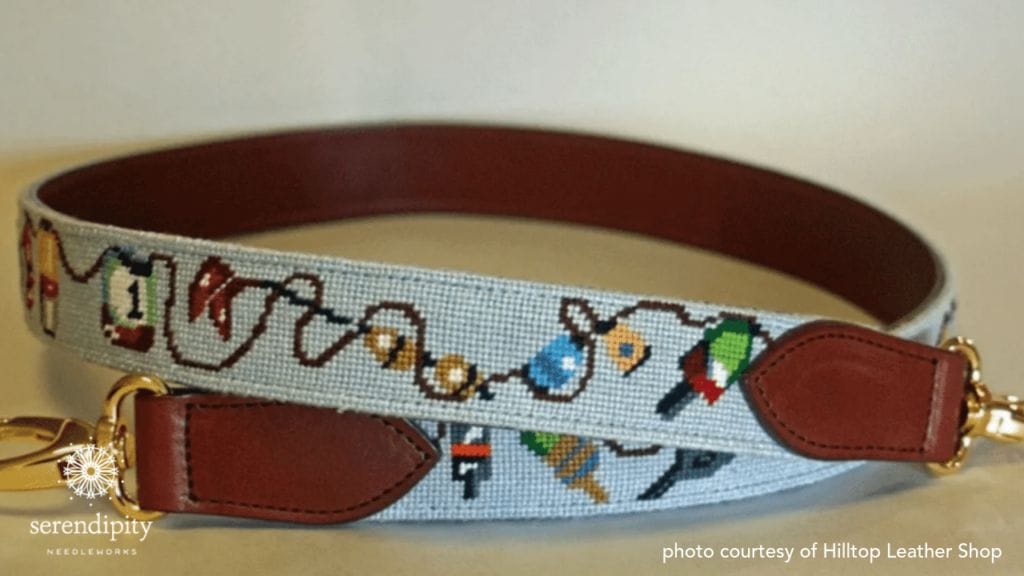
You can use the binding stitch on cuff bracelets, coasters, purse straps, pet collars, key fobs, and lots more, too! My friends at Hill Top Leather Shop do a terrific job and they’ve been finishing belts and pet collars for me for several years. They’re graciously allowing me to share pictures of their fantabulous work with you here. Isn’t that purse strap in the picture above just adorable?
Let’s chat a minute about why you should use the binding stitch.
The binding stitch creates a sturdy edge for your needlepoint belt (or whatever similar project you may be stitching). Why is that important? Well, the edges of a belt – just like the edges of any wearable – get a lot of abuse. Just think about how much friction there is between a belt loop and a hand-stitched belt. And there’s not just one belt loop on a pair of pants… you’ll usually find seven!

So, how do you do the binding stitch?
Terrific question! It’s really not hard at all. In fact, it’s almost hypnotic once you get the hang of it. It should only be done after your project is completely stitched, though. Now, whaddya’ say we dive in?
First, secure your thread under some stitches on the back of your work. I like to use the same thread for the binding stitch that I used as my background thread.
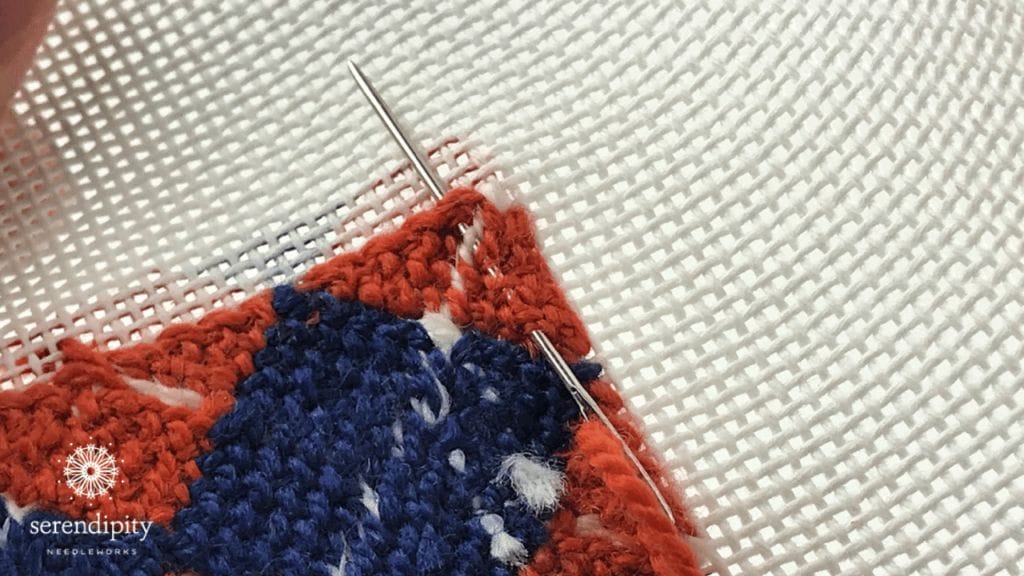
Flip your canvas back over so that the front is facing you. Bring your needle and thread to the front at the top of the row, two threads over from the end of the needlepoint.
Then, fold the unstitched canvas to the back so that the top row of your needlepoint is at the top edge.
Now you’re ready to begin working the binding stitch.
With the back of the canvas facing you and working from right to left, begin by making a whip stitch over the canvas. Next, make two more whip stitches in the next two available canvas holes. Be sure that you’re going straight through the canvas – and that you’re not piercing your work on the front side. (Work the binding stitch over two canvas threads, or one empty hole.)

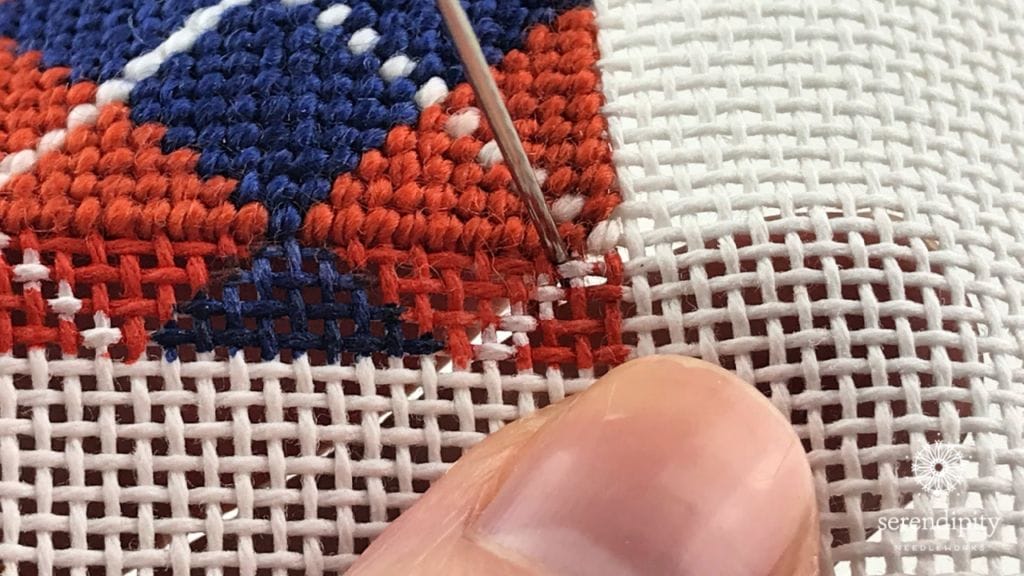
Once that’s complete, you’ll work back three…
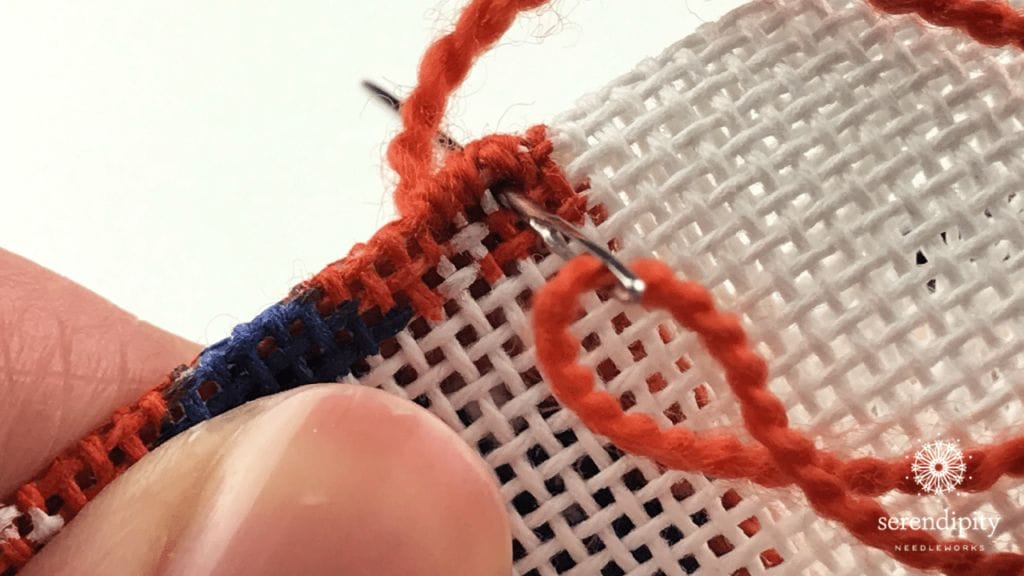
then up to the first available empty hole.

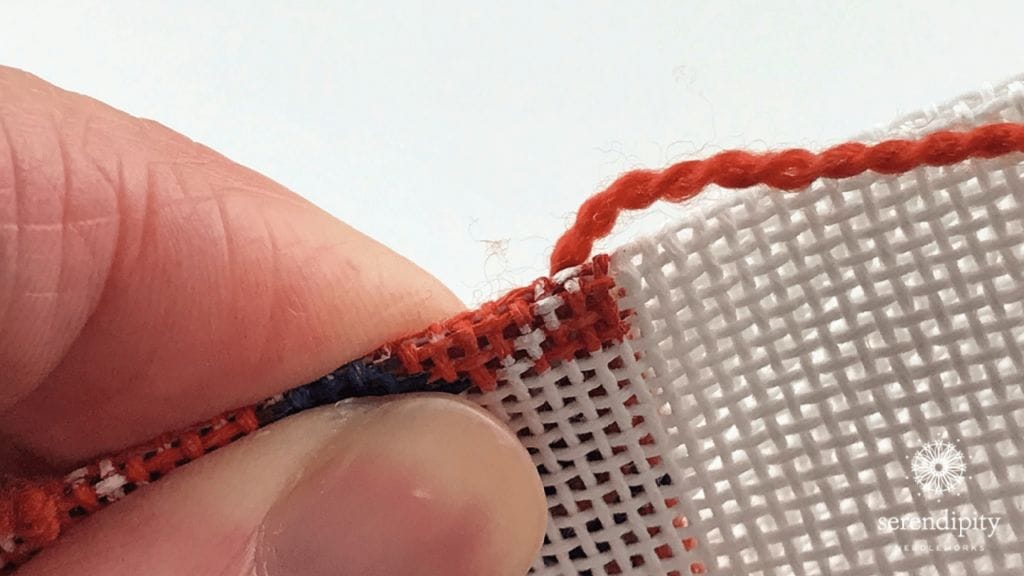
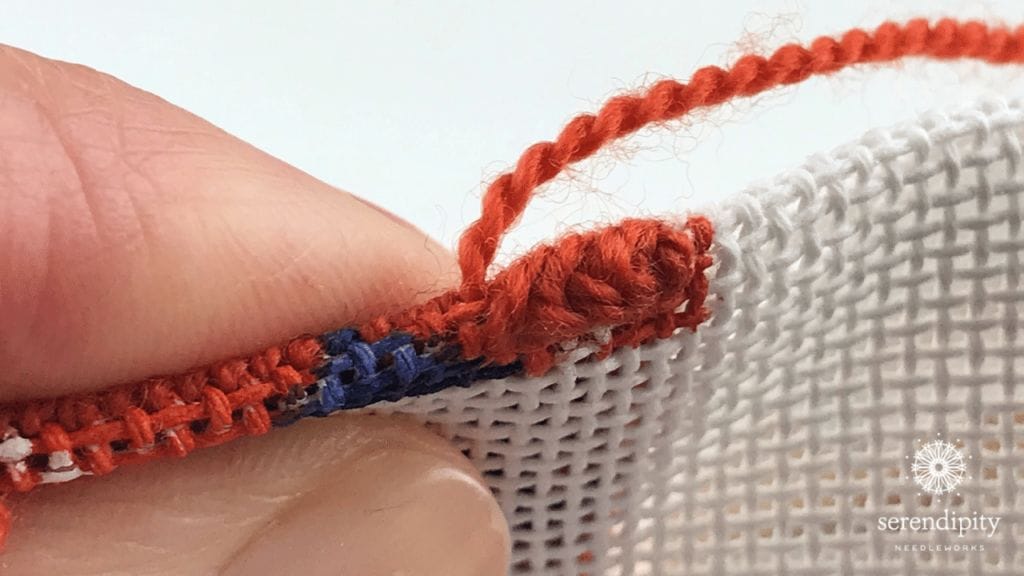
And back three, then up to the first available empty hole. This is where the rhythm kicks in – back three, up one, back three, up one, and so on, until you reach the end of the row. The picture below shows what the binding stitch should look like.
I made a handy downloadable step-by-step guide for you, too. Just click the button below to get your copy.

And be sure to tag me when you share pictures of your belts, pet collars, key fobs, and other projects featuring the binding stitch. (Not sure how to tag someone in a picture on Instagram? Click here for instructions.)
That’s all for now, dear friend. I’ll see you on Thursday at 3:00 p.m. CDT for the next episode of Serendipi-TV.
I hope you have a wonderful week.
XOXO!


Great instructions, thank you. I’d love to see instructions like this for turning a corner. That is where I run into problems with the binding stitch.
Thank you, Christine! I’m so glad you found my instructions helpful. 🙂
And thank you for your suggestion. I’ll definitely add “turning a corner” to my list of future topics.
XOXO!
Ellen
Does the light blue strap you posted have a binding stitch?
Also, I’ve always been told to stitch two extra rows when stitching belts. Does that rule still apply if using the binding stitch?
Finally, I like the look of the dog collars you posted that have a contrasting color on the edges. Was this just the binding stitch that was a different color, or did the person stitch two extra lines in a contrasting color and match the binding stitch to the basketweave?
Hi Shannon! 🙂
You have some terrific questions. First, you were advised correctly to stitch two extra rows when making a belt. The binding stitch, however, takes the place of those two extra rows. It’s worked on both long edges of the belt instead of those two extra rows of basketweave/tent stitch.
The dog collars are really cute, aren’t they? 😉 And you have a keen eye. You’re absolutely right about the binding stitch being worked in a contrasting color. The stitcher did that to add some extra pizazz to the collars. Again, it’s not necessary to work two extra rows of tent stitch + the binding stitch. The binding stitch takes the place of those two extra rows.
Please reach out if you have more questions. I’m happy to help.
Have a marvelous Monday…
XOXO!
Ellen
Thank you!
You’re very welcome, Shannon. 🙂
Hi — Thank you for posting these instructions. How is the needlepoint then attached to the belt? With glue?
Hi Tama!
Thank you for writing. It’s great to hear from you! I’m so glad you found the instructions helpful. I’m afraid I don’t have an answer for you about that. I send my belts to a professional leather finisher in Kentucky and I don’t know their process. I can tell you that the belts I’ve received back from them have the canvas stitched to the leather.
I hope this helps. Have a terrific Tuesday!
XOXO!
Ellen
Thank you for these great instructions! If binding a coaster where I want to do 4 sides, is there anything I should be aware of when doing corners?
Also, can this be done a round shape?
Hi Caroline
You have a terrific question. When binding a coaster on all four sides, you’ll have to miter the corners of the canvas that you turn under. And in regard to round shapes, I’ve never tried it. I don’t think it would be easy, though.
Have a terrific rest of your day and happy stitching!
XOXO!
Ellen
How do I deal with stopping a thread and the starting another one?
You can weave the tail of the old thread into the back of your design stitches – and you can start a new thread the same way. Hope this helps… I’ll make a note to do a demo in The Stitcher’s Club Community, too. 😉