
Last week, we chatted about needlepoint stitch pathways and some questions have popped up, so I thought we’d take a look at some examples here today. Before we dive in though, let’s do a quickie review. Simply put, a stitch pathway is the order in which you execute each part of a stitch or stitch pattern.
Let’s take a peek at those different kinds of stitch pathways again.
- Satin
- Running
- Double Running
- Backstitch
- Run & Back
- Conservative
And we’ll start with the kind of stitch pathway that you’ll find yourself using the most often…
Satin
With this type of pathway, you’ll have as much thread on the backside of your canvas as you do on the front. That’s because you’re working in a circular motion around the canvas threads as you make your way across (or down) a row. The stitches sit side by side on your canvas, as in the example I shared with you last week – the upright Gobelin.
And here’s another stitch with a satin pathway that you might be familiar with…
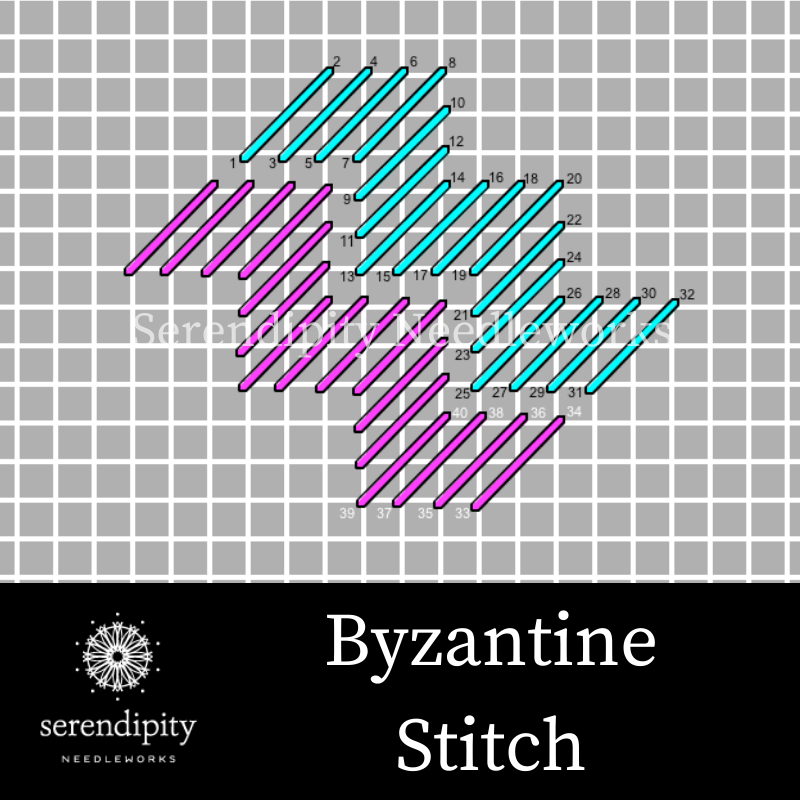
Study the stitch diagram above and pay particular attention to the circular motion of the pathway – 1 to 2 to 3 to 4, etc. Pull out a doodle canvas and try it for yourself, so you can experience that circular movement for yourself, too.
Now, let’s look at…
Running Stitch Pathways
Have you ever used a darning pattern on one of your needlepoint canvases? If you have, then you’ve used a running stitch pathway. This pathway uses an up and down forward advancing motion.
Here’s a stitch diagram that illustrates the running pathway…
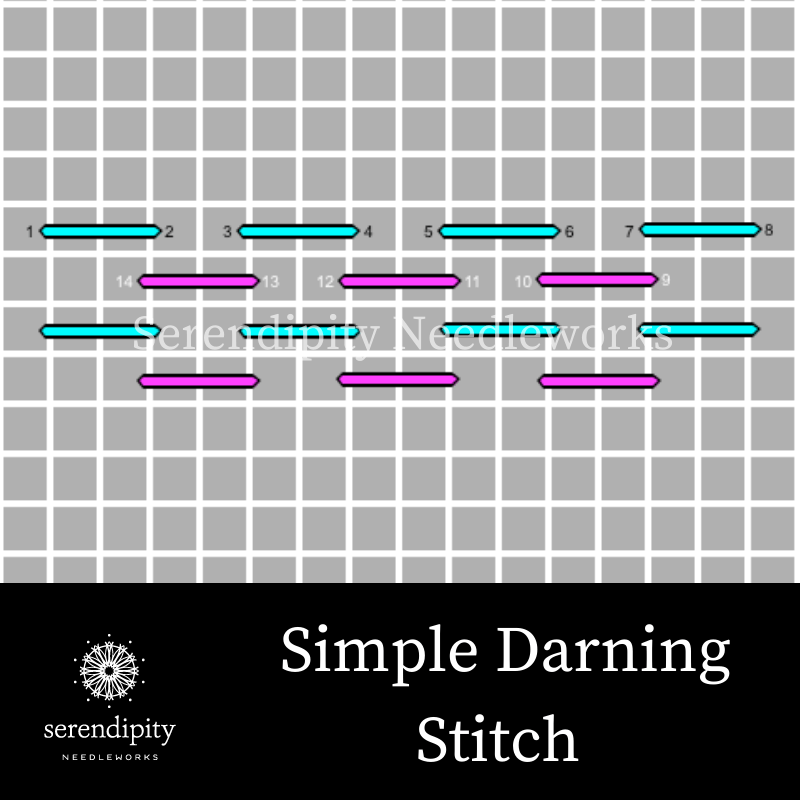
Grab that doodle canvas again and give it a try.
Next up…
Double Running
This kind of pathway is one in which a single row of stitches is executed in two passes – across and back – to complete the row.
You can see it in action here on the alternating oblong cross stitch…
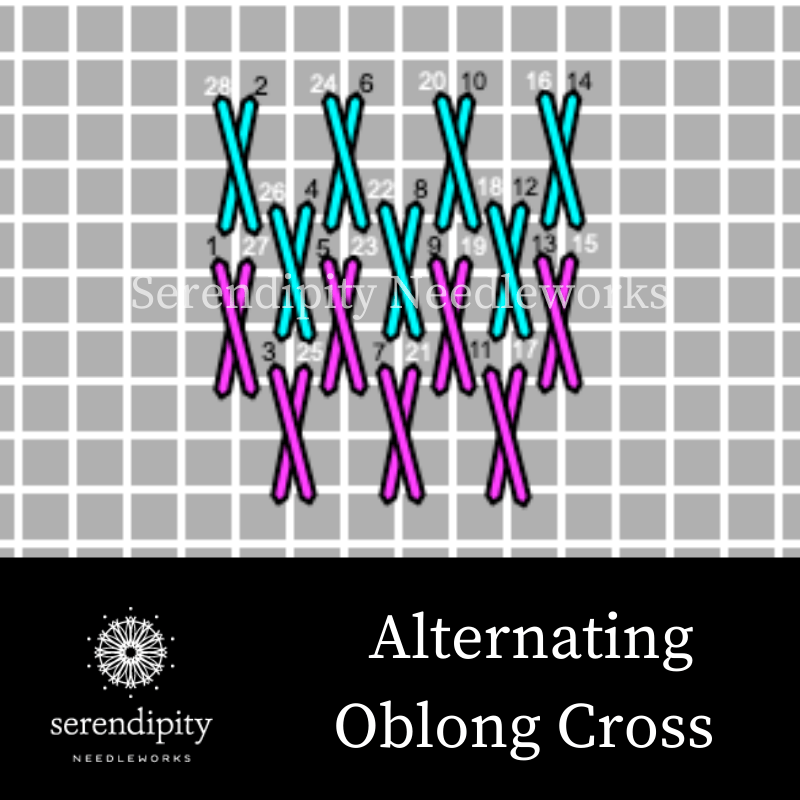
The double running stitch pathway is a little more complex than the first two, so give it a test run on your doodle canvas. It’ll make a lot more sense after you try it yourself.
Moving right along, let’s take a closer look at the backstitch pathway.
Backstitch
So, what’s the scoop on the backstitch pathway? It’s really very simple. Just like with the satin pathway, you’re working in a circular motion around the canvas threads.
But here’s the difference – stitches in a backstitch pathway lay end to end instead of beside one another.
In fact, the backstitch (yes, it’s a stitch, too!) is about the best example of this kind of pathway.
Here’s the diagram for you…
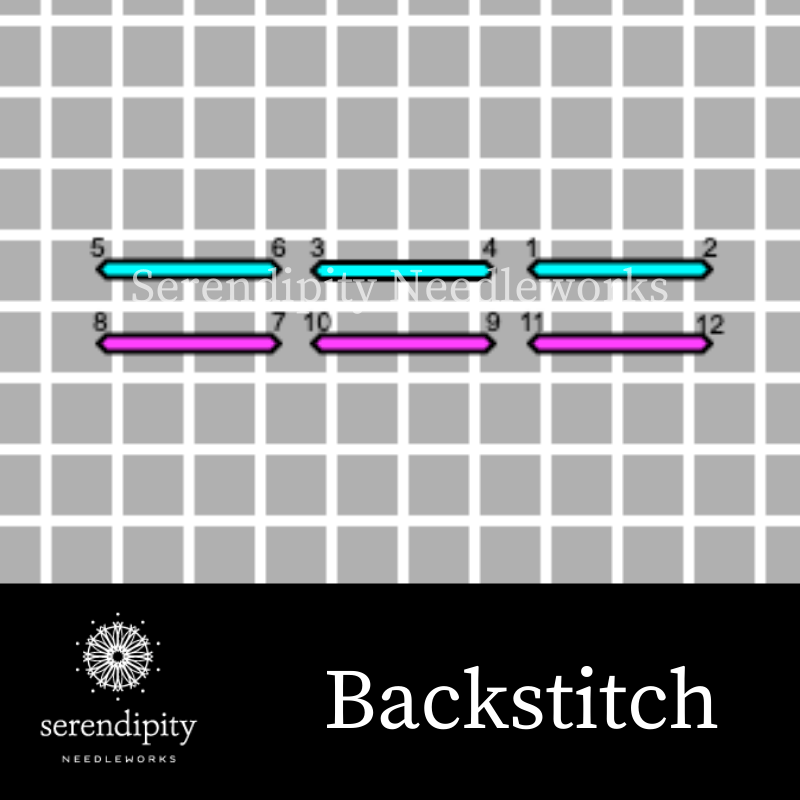
Test it out on your doodle canvas to get a feel for the backstitch pathway.
Alrighty – now let’s take a peek at the run and back stitch pathway.
Run & Back
This needlepoint stitch pathway is a “composite” pathway – it combines the running pathway with the backstitch pathway to create an entirely different stitch pathway.
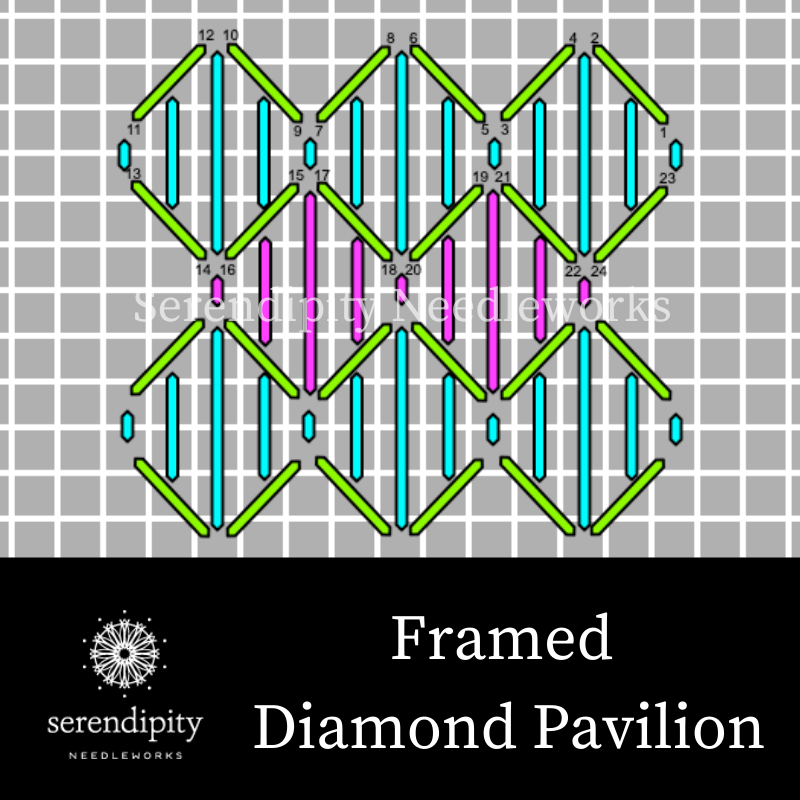
The “frame” that is worked around the diamond pavilion stitch is an excellent example of a run & back pathway. The green stitches represent the “frame” portion of the stitch pattern in the diagram below. If you look closely, you’ll notice that 1 – 2 is the “run” portion and 3 – 4 is the “back” portion.
Again, use your doodle canvas to test it out for yourself. There’s always learning in the “doing”. 😉
And that, my friend, brings us to the last of the needlepoint stitch pathways…
Conservative Stitch Pathway
To conserve means to save and when you use this kind of pathway, you leave very little thread on the backside of your canvas. It’s the antithesis of the satin pathway.
If you’ve taken my Needlepoint Made Easy online course, you know that diagonal tent stitch (aka, basketweave) uses the largest quantity of thread (of the three variations of tent stitch) and that it creates a very solidly interwoven mesh of threads on the back of your canvas. That’s what makes it so durable. 😉
Conversely, the half-cross variation of tent stitch uses the least amount of thread (of all the tent stitch variations) and it leaves the least amount of thread on the backside of your canvas. Hence, the half-cross tent stitch is a good example of a conservative stitch pathway. (NOTE: It’s also the least durable of the three variations – eek!)
Here’s the diagram for you…

Give this one a whirl on your doodle canvas, too. Then you’ll have a handy little sampler of each kind of needlepoint stitch pathway as a reference tool.
Okey dokey – that’s all for now, my friend. Thank you ever so much for stopping by for a visit today.
Until next time, happy stitching…
XOXO!!!


Thank you so much! As a beginner, the pathways series has been very helpful.
Kind regards, Susan
Hi Susan!
Thank you for your kind words. 🙂
I’m so glad you found my blog posts helpful. Please feel free to reach out if you have any questions. I’m here for you!
XOXO!
Ellen
I found this very informative & makes complete sense. Not something I have thought about until now.
I’m so glad you found it helpful, Juliet! There are so many little nuances to needlepoint that slip under the radar. 😉