Well hello there!
Did you see last week’s blog post? If you didn’t, you might want to click here to read it first. And if you did read it, well – we’ll just go ahead and dive right into how to stitch those weird little shapes on your needlepoint canvases in diagonal tent stitch/basketweave.
Sound good? Terrific… let’s get started!
First, here’s a new picture for you. I posted it over on Instagram last week, but if you don’t follow me, then you probably missed it.
Notice anything different from last week’s picture?
Yep… I frogged that little gold motif in the bottom righthand corner so I could show you how I stitch these little buggers step-by-step.
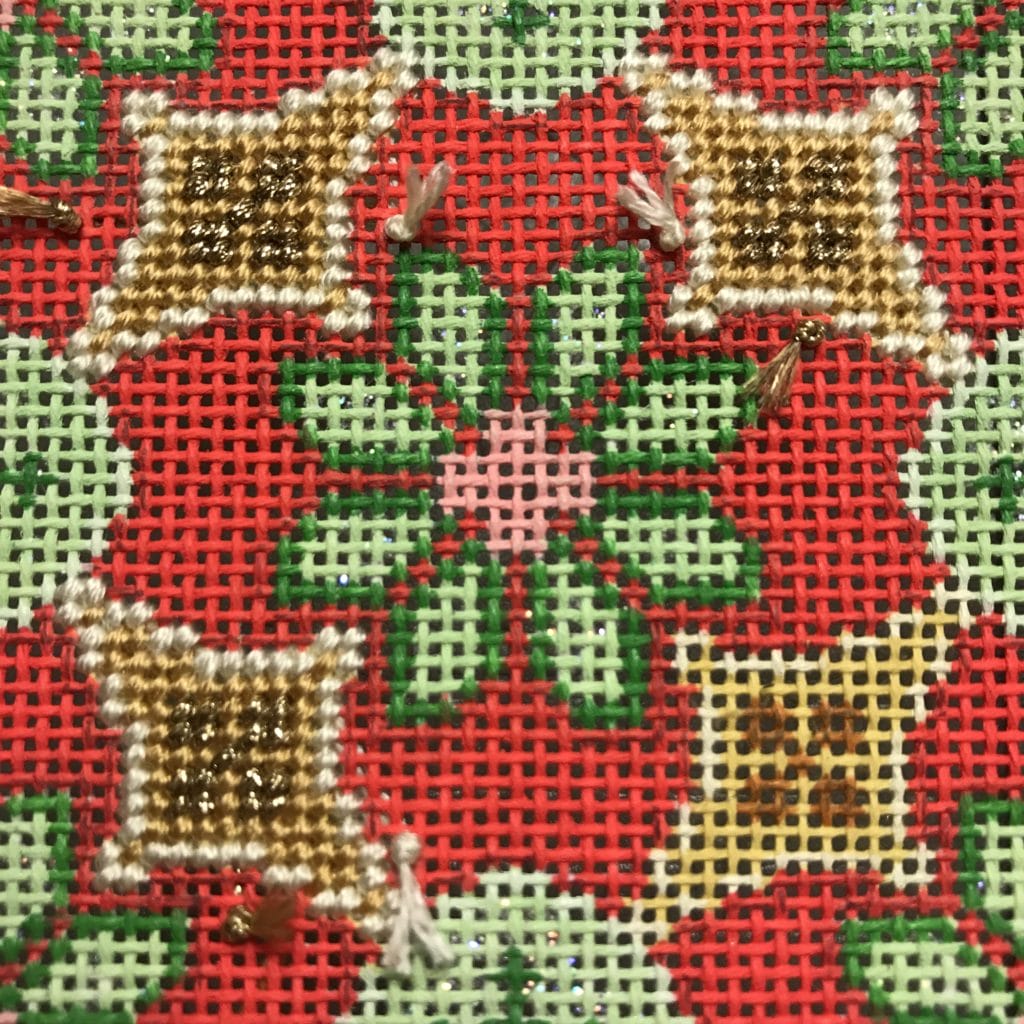
Stitching oddball shapes in diagonal tent stitch can be a wee bit of a challenge…
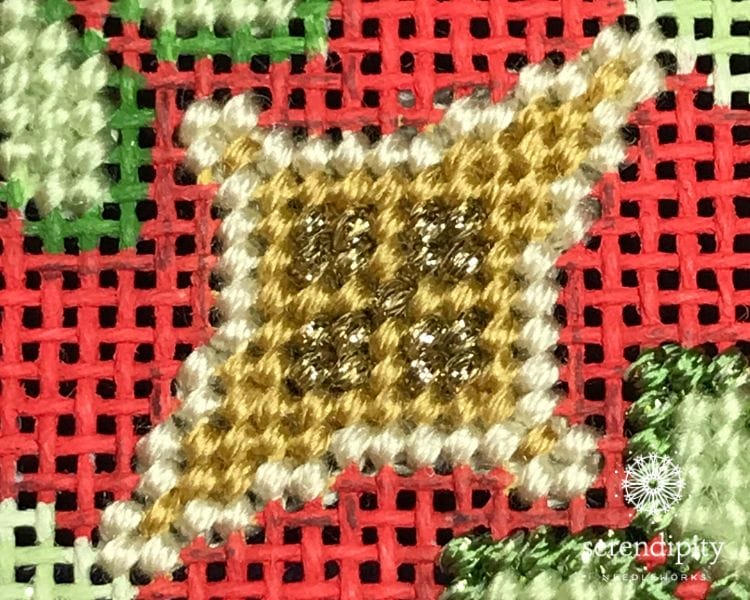
especially when you’re working with more than one color. And that’s just exactly what the situation is with this canvas. Each little diamond shape motif on this design features three colors – light gold, medium gold, and dark gold.
Usually, I recommend that you begin with the lightest color, but since the light gold is only an outline here, I’m starting with the medium shade of gold.
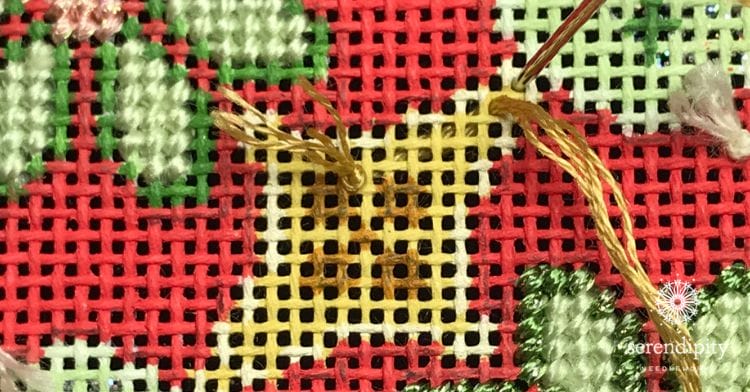
And I’ll bet you’re wondering why I’m doing that, aren’t you?
That’s a terrific question – and it’s because I’d like to have a decent size place to end my threads when I stitch the outline of the motif. I’ll weave the tail of my light gold thread over and under the stitches on the back side of the medium gold area.
Make sense? Great!
Remember to work your diagonal tent stitches “up the steps and down the poles”.
The first three stitches in this motif are single stitches, but as the shape widens, there are enough stitches in a row to begin implementing the “up the steps/down the poles” method.
This picture shows me in position to work a three stitch “up the steps” sequence…
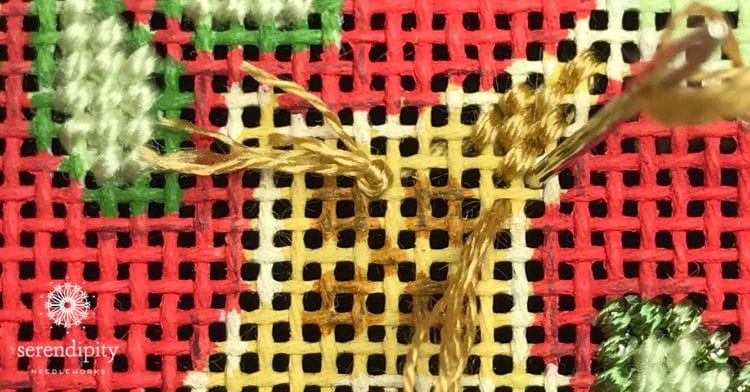
And here’s how I work my way around the dark gold areas inside the motif…
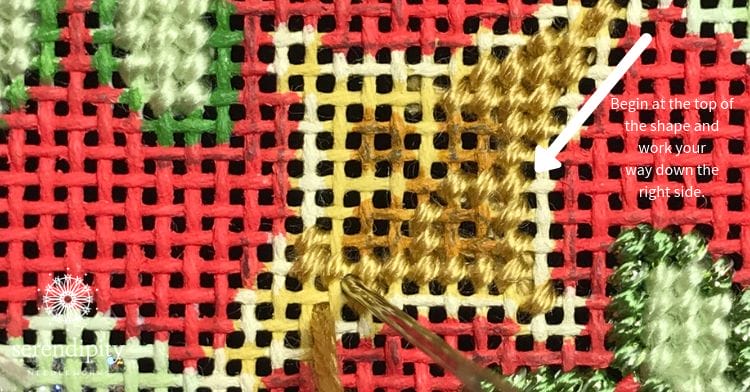
Notice how I’m stitching from the top of the shape down toward the bottom…
and that I’m skipping the dark gold areas?
You see, I don’t like carrying my thread across more than three or four canvas threads and if I were to stitch in true diagonal rows, there are some places I’d have to carry my thread too far.
Are you still with me? Terrific!
And remember, if you have a question – you can always leave me a comment down below ???? or send me an email.
Alrighty – now, let’s take a peek at working my way down the other side of the motif…
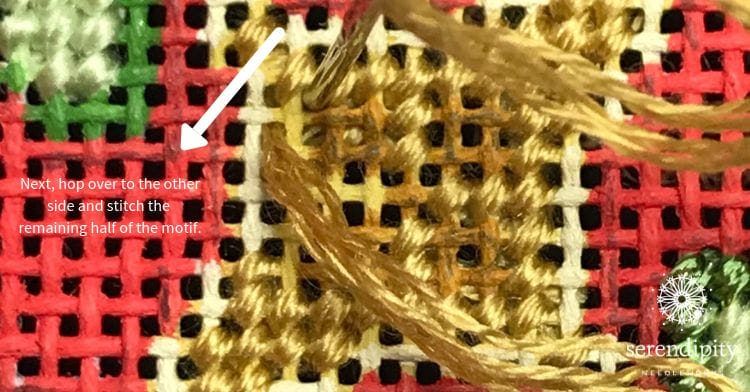
My needle is in place and I’m picking up where I broke away to stitch the bottom half of the motif.
I’m using my trusty “up the steps/down the poles” method and when I finish filling in all of the missing medium gold stitches, my rows will meet seamlessly.
Pretty nifty, huh?!
Sooo – whenever you stitch “up the steps” and “down the poles”, your rows will always meet up! I’ve never run into a situation where it didn’t work out.
Kinda like magic, isn’t it? ????
Okey dokey – now it’s time to work the light gold outline…
I’m using continental tent stitch to work the outline.
You can see, in this picture, that the canvas isn’t stitch painted precisely.
I’m eyeballing it and making the necessary adjustments to ensure that the stitched motif is symmetrical.
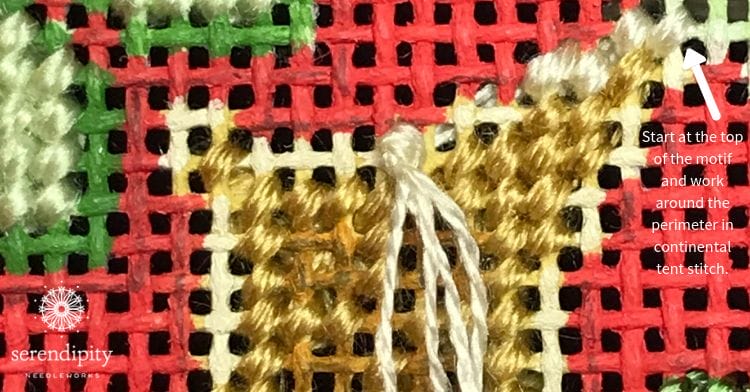
(Note: The tails on my waste knot are too long, but they’re that way because my fingernails are really short and I need those little tails to pull on when I’m ready to clip the knot. I’m just super careful to keep them out of the way.)
And here’s another picture for you with more of the outline stitches in place…
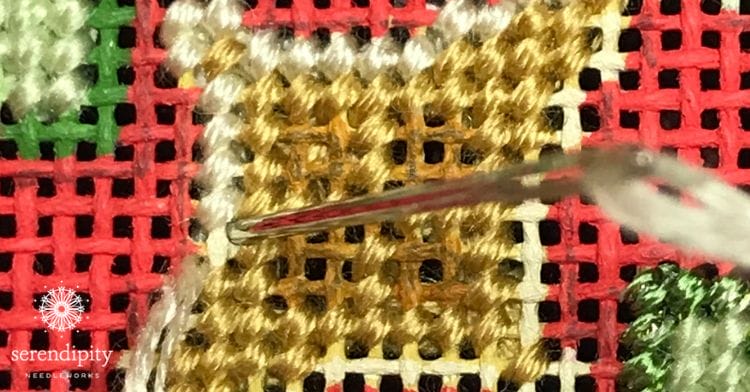
Always remember to keep an eye on the back of your canvas to make sure you’re working in continental tent stitch and not half-cross. ????
All I have left to do now is stitch the dark gold areas.
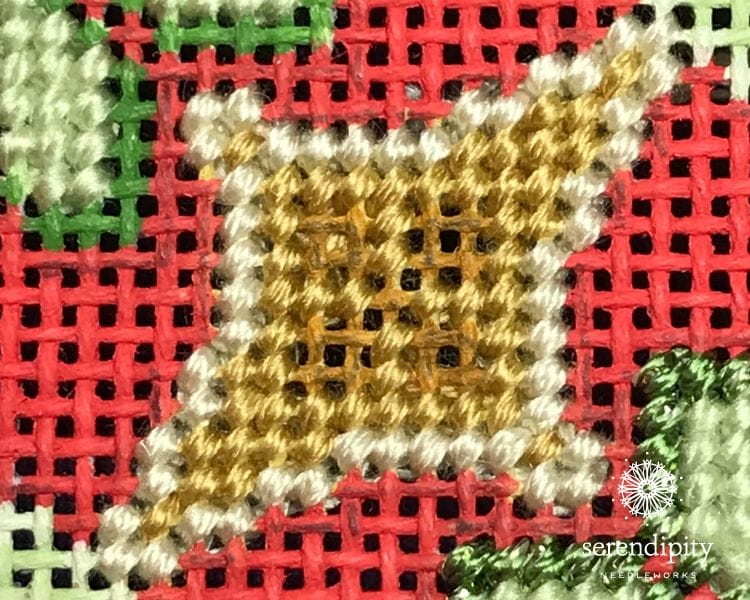
And Voilà! Here’s the finished motif. ????????????
Next time, we’ll chat about filling in the background around all those irregular shapes using diagonal tent stitch. Sound good?
Oh – and before you go, be sure and let me know what your biggest takeaway is from this post about using diagonal tent stitch in irregular shapes. Did you have any “aha” moments?
Remember, every time you leave a comment down below a post, I’ll enter your name into my monthly drawing for a super-fun giveaway. And for November, it’s another exclusive Serendipity Needleworks needle minder. ????
I can hardly wait to hear what you have to say. I read all of your notes and appreciate each and every one of them so very much! ❤️
Until next time, happy stitching!
XOXO!!!




Dear Ellen: The detailed step-by-step stitching instructions, coordinating photos, and pointing out the reasons why were so helpful! Taking so many pictures along the way with the written explanation helps various types of learners, especially those of us who need to understand stitch by stitch and why 🙂 Why and how you started and with what color; where you could do three stitches up the steps; how you were going to weave your thread tails after you had stitched the design areas. Being careful and thoughtful.
Another fact I enjoyed was your statement and example of where the canvas was not stitch-painted correctly and how you determined where to stitch to make that part of the design element match the other corners. This is a problem solving technique we need to employ frequently; I have come across this so much recently. Your advice to go slowly and figure it out mentally, rather than frog it later (LOL).
These details are so helpful. Also when working the light gold outline, you reminded us to check the back of our work to ensure that we were covering the canvas and not using half cross. This is a very beautiful ornament, and it is such a great learning experience to follow along with you step-by-step. The close up photos were a big help, too, because we can look and reason out visually the process of each and every stitch. Thank you for taking the time to do this detailed explanation for us; I hope it was not too tedious for you. Great learning experience. Thanks again.
Looking forward to the next blog on stitching the background. 🙂
Hi Pamela!
Thank you for sharing how my post was helpful to you. Your feedback is so very valuable to me and I appreciate you taking the time to write. Have a very Happy Thanksgiving and Thanksgiving holiday weekend!
XOXO!
Ellen
What is the difference between continental tent stitch and a half stitch? Is it that continental is over one intersection and half stitch is over 2?
Beautiful stitching, by the way. Inspiring. Makes me aware of bad stitching habits. Thank you.
Hi Carol!
Thank you for your note. I apologize for my delayed reply… I missed seeing your comment earlier.
You have a terrific question! The short answer is that continental provides better coverage on the back side of your work. The back of continental looks like long slanted stitches. Half-cross is the least stable form of tent stitch and when you look at the back of your work, you’ll see short vertical stitches. Both are worked over one canvas intersection. I’ll share some pictures in my next blog post so you can see what I’m talking about more clearly.
And thank you so much for your kind words about my stitching. ❤️
Have a terrific day!
XOXO!
Ellen ????
Hi, I appreciated seeing the small shapes and that you go down one side then the other. I have worked backwards sometimes. As if when you where at bottom on right side then I would work backwards and do up the left side. Oops
Hi Carrie!
Thank you for taking the time to write. It’s great to hear from you! ????
I’m so glad that you found the info in this post helpful. The main things to remember when working small shapes are to work your stitches “up the steps and down the poles” consistently and not to carry your thread across the back too far.
Have a happy Wednesday!❤️
XOXO!
Ellen
I would love to be a member! How do I sign up?
Hi Cathy…
Thank you for your note. I’m forwarding your name to my assistant, Grace. She’ll be glad to help you with getting more info on The Stitcher’s Club.
XOXO!
Ellen