
If you’re new to needlepoint, you might not realize, yet, that needlepoint has its own language. And even if you’ve been stitching for a while, there may be some terms or phrases that you’re not familiar with, so…
Today, we’re going to take a closer look at the language of needlepoint (aka needlepoint lingo).
I’ll do my best to unravel some of the most common terms and phrases for you. Sound good?
Alrighty then, let’s dive in…
First, let’s take a look at a few of the tools and materials we use.
1. Canvas
Your canvas is the foundation of your needlepoint project. It is the fabric on which you stitch. Needlepoint canvas is typically made of cotton and it comes in different sizes/mesh counts. The mesh count indicates the number of stitches per inch, with a higher count providing more detail, but requiring finer threads.
2. Thread
Thread is the essential element that brings your needlepoint canvases to life. There are oodles of different kinds of thread available to today’s stitcher, including luscious cottons, wools, silks, and linens. And there are scads of sparkly metallics and fun novelty threads, too. Each type of thread has its own unique qualities that add depth and richness to your projects.
3. Tapestry Needle
Tapestry needles are the needle of choice for needlepointers. They are relatively short, with a long eye and a blunt point. The large eye allows for the use of heavier weight threads and the blunt tip prevents the stitcher from piercing the canvas threads.
4. Needlepoint Frame
There are actually two different kinds of needlepoint frames: the stretcher bar frame and the scroll frame. The purpose of a frame is to hold your canvas taut while you are stitching so that your stitch tension is more consistent. Using a frame helps prevent distortion of your canvas, too.
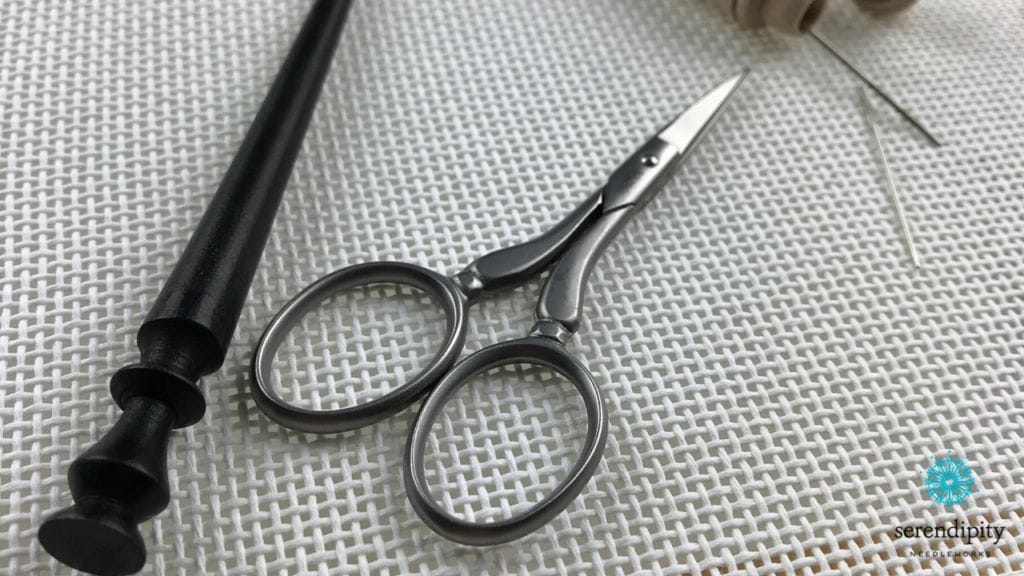
5. Laying Tool
A laying tool is, essentially, just a stick. It is used for manipulating your thread as you take a stitch to ensure that the strands stay smoothly parallel, instead of twisting up on each other. Laying tools are also especially helpful when working with ribbon type threads, too.
Of course there are lots of other tools and materials that we use in our needlepoint hobby, but these are the essentials.
Now, let’s take a peek at the needlepoint language that pertains to stitching.
6. Tension
Tension refers to the tightness – and evenness – of your stitches across the canvas. When you are able to maintain consistent stitch tension, your pieces will look more attractive. Practice finding the right balance between stitches that are too loose and those that are too tight. (And remember – working on a frame will help you perfect your stitch tension.)
7. Decorative Stitch
Decorative stitches are those fancy stitches that you can use to add texture and dimension to your needlepoint projects. They can either be counted canvas embroidery stitches or freestyle surface embroidery stitches. Decorative stitches add richness of color and pattern, helping to transform your projects into three-dimensional pieces of needlepoint art. (Be sure to check out Needlepoint TV™, the Serendipity Needleworks YouTube channel, for oodles of video tutorials on how to do some of my favorite decorative stitches.)
8. Waste Knot
A waste knot is a simple knot that sits on top of your canvas. It anchors your thread as you begin your first stitches. To make a waste knot, tie a knot in the end of your thread. Take your needle to the back about an inch from where you want to begin stitching. (The knot will sit on top of your canvas.) Next, come up in the canvas where you want to make your first stitch. You should see a line of thread on the back of the canvas. As you work across the row, your stitches will wrap around the thread and, consequently, secure it in place. When you get to the waste knot simply snip it off and continue stitching along the row.
9. Blocking
After you finish stitching your needlepoint canvas, you will need to block it to restore the canvas to its original shape. The act of blocking will also fluff up your stitches. Blocking needlepoint is an important step in finishing all needlepoint projects. (Even if you use a frame, you’ll still need to block your needlepoint canvas.)
Now that you know more about some of the needlepoint lingo that goes along with stitching your project, let’s delve into some of the more unique needlepoint vernacular.
The language of needlepoint includes some unusual phrases…
10. PIP
PIP stands for “Project(s) In Progress.” The term refers to your ongoing needlepoint project (or projects!) that are still works in progress. (Sometimes, stitchers refer to their current projects as WIPs, too, which means “Work in Progress”.)
Stitchers often share their PIPs on social media as way to showcase their progress and receive feedback and encouragement from fellow needlepointers.
11. LNS
Local Needlework Shop – or LNS – is typically a reference to small, locally owned independent retail stores that specialize in selling needlework/needlepoint supplies. In other words, not the big box craft chains like Michael’s, Hobby Lobby, or JoAnn’s.
12. Frogging
Frogging is a term that describes the act of removing stitches that were either made incorrectly or that didn’t turn out like you wanted them to.
So, why frogging?
Well, when a needlepointer wants to remove unsatisfactory stitches, he/she says “rip it, rip it”, which, resembles the “ribbit, ribbit” sound a frog makes. 😉
While frogging can be frustrating, it’s a normal part of the learning process. ALL stitchers encounter the need for frogging. Remember, mistakes happen, and frogging allows you to correct them.
And there you have it…
A quick overview of the language of needlepoint
By familiarizing yourself with these twelve common terms, you are equipping yourself to navigate the exciting world of needlepoint with confidence.
Remember, building your skills in needlepoint is a journey that combines passion, patience, and practice. Embrace the joy of learning, and let your creativity flourish with each stitch you make.
And speaking of embracing the joy of learning…
In a couple of weeks, I’m teaching a new workshop for people who want to learn how to needlepoint. It’s also a terrific refresher for anyone who has been away from needlepoint for while and wants to pick it back up, too, though. And if you taught yourself to stitch, you might want to join us to make sure you’re using the most effective – and efficient – techniques to get the absolute best results on your projects!
You can learn more about it here.
Okey dokey, my friend. That’s all for now.
Thank you ever so much for popping in to read this week’s blog post. I hope you found it helpful. 🙂
Have a terrific rest of your week and, until next time…
Happy Stitching
XOXO!!


Never thought I’d be saying it, but I’m really enjoying – and learning – from your blogs, website, etc. Thank you.
Paula
Thank you, Paula! I’m tickled to know that you’re finding the information helpful! Have a terrific rest of your day…
XOXO!
Ellen