As Fräulein Maria sings in The Sound of Music… “let’s start at the very beginning – a very good place to start!”
First of all, you may be wondering why you even need to know about stitch diagrams.
The short answer is that if you ever plan to use decorative stitches on your needlepoint canvases, you’ll need to understand what stitch diagrams are and how they work.
I like to think of them as little roadmaps. They tell you the order in which to work the stitches in a stitch pattern.
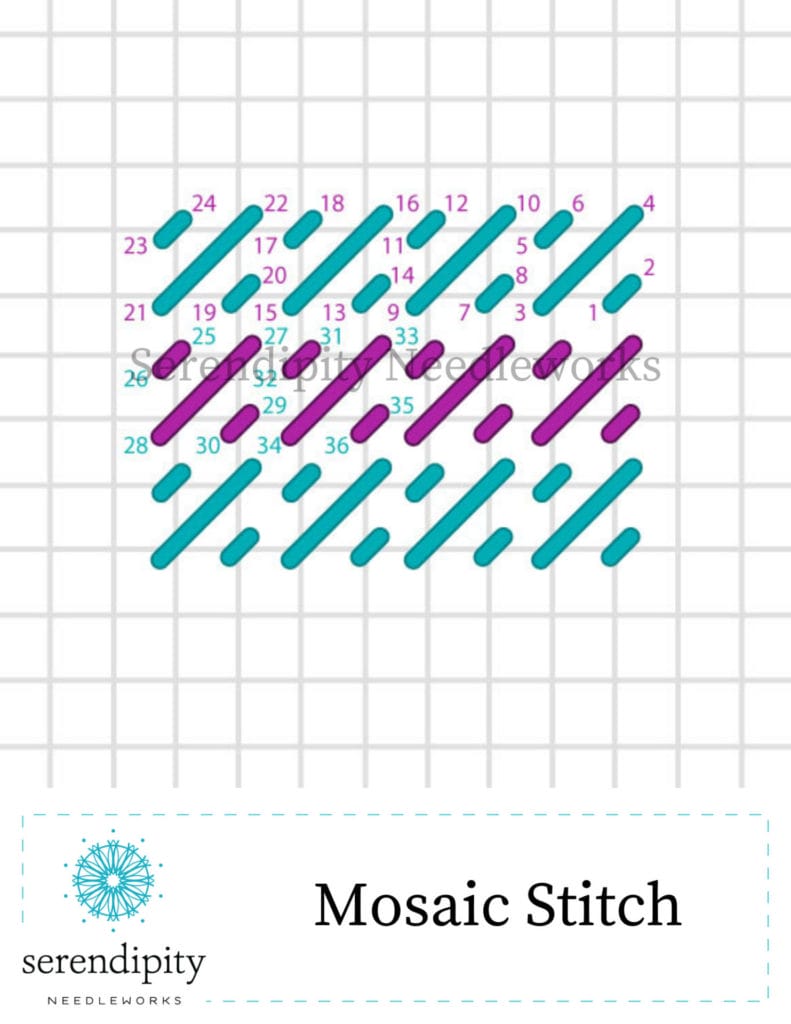
Here’s one of my stitch diagrams…

The gray lines on the diagram represent the vertical and horizontal canvas threads of a piece of needlepoint canvas. (Each gray line represents a single canvas thread.) Canvas intersections are where the vertical gray lines/canvas threads run into the horizontal gray lines/canvas threads at right angles.
And that brings me to a very important tip…
I recommend that you count canvas threads when working decorative stitches – instead of counting the holes. It is much easier to keep up with what you should be doing when you are counting an actual “thing” (i.e., canvas thread) instead of a negative space (i.e., canvas hole).
Now, back to stitch diagrams.
The colored lines on my diagrams indicate the individual stitches of the stitch pattern. The numbers direct you as to the order in which to execute each stitch in the pattern. In other words, begin at 1 and keep moving through the pattern in sequential order. Note that you’ll bring your needle to the front of your canvas on the odd numbers. To complete a stitch, you’ll take your needle to the back of the canvas on the even numbers.
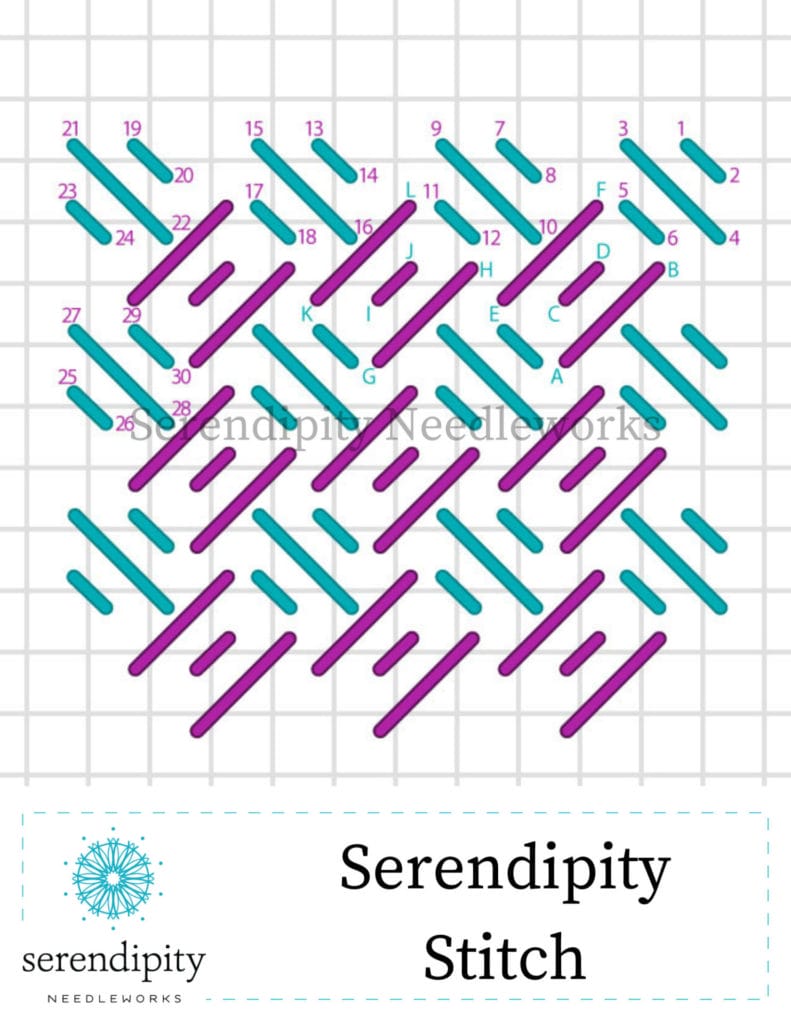
If you have a stitch diagram with numbers and letters on it, that means it’s a “two-step” pattern. On my stitch diagrams, I always designate the stitches that you ought to work first with numbers. The stitches for “step 2” are indicated by letters. Again, work sequentially – from A – Z.
Here’s a stitch diagram with numbers and letters on it…

Sometimes, you’ll find stitch diagrams that don’t have either numbers or letters on them.
And those kinds of diagrams can be very confusing – especially for stitchers who are new to using canvas embroidery stitches (aka decorative stitches) on their projects. In fact, I recommend sticking with labeled diagrams, unless you’re an experienced stitcher. 😉
So, where do you find stitch diagrams? Great question! You can find them in lots of different places – for all kinds of applications. There are quite a few right here on this blog. We have some on our Pinterest page, too. And, of course, you’ll find them in stitch guides.
Stitch guides are detailed project guides. I wrote a blog post about them that you can read here.
If you want to practice working from a stitch diagram, my best advice is to get some blank canvas and mount it on a stretcher bar frame. I like to use 13 mesh canvas so I can easily see the individual stitches in the pattern. My favorite thread for practicing is Vineyard Merino Wool. It’s a single strand thread that has a tight twist. It’s very durable, so I can “reverse stitch” (i.e., pick out) without damaging the thread too much. DMC Perle cotton #5 works very well, too. 🙂


Hi, Ellen. A great post and very timely. I returned to needlepoint about a year ago. Due to neurological issues I had a several year hiatus.
After many months of relearning and practicing tent stiches, I’m finally ready to decorative stiches!
Horray!
Hi Morri!
It’s so nice to hear from you. I’m delighted to learn that you’re returning to needlepoint. 🙂
You’re going to have so much fun trying your hand at decorative stitches.
Thank you for your kind words about my blog post, too. I hope you found the info helpful. I have several other articles about decorative stitches that you might find useful, so be sure to use the search bar and type in “decorative stitches”. That should bring up lots to browse through. 😉
And if you haven’t already subscribed to NeedleNotes (my weekly email), you might want to do that, too. There’s a place to sign up at the very bottom of this page. If you have any questions – or need help – please feel free to send an email to my team. Tory will be glad to assist you.
Have a terrific rest of your day and welcome to our Serendipity Needleworks family!!
XOXO!
Ellen
PS: Your note has sparked an idea for a new blog post – so stay tuned!
Really appreciated your suggestions and information.
Thank you for your kind words, Jean. I appreciate it – and you – so very much! And thank you for taking the time to visit my website to read the post. I’m glad you found the info helpful. 🙂
Have a happy Tuesday!!
XOXO!
Ellen
Thanks for this article. I use stitch diagrams and have learned from you to count threads. I always prefer numbered diagrams and not that good at diagrams without numbers.
Hi Martha!
Thank you so much for your sweet note. I’m glad you found the blog post helpful. I’m definitely a firm believer that counting threads is the key to making it easier to “decode” those stitch diagrams so that you can transfer what the image illustrates onto you project. Of course, the numbers and letters help, too. 😉
I’m sure you’ll get the hang of using unlabeled diagrams, too, though. And your note has sparked an idea for me about something to try in The Stitcher’s Club – so keep an eye out. 🙂
Have a terrific rest of your day… and happy stitching!
XOXO!
Ellen
Thank you Ellen! But is there a guideline for using diagrams without the pathway spelled out?
Great question, Monica! And the short answer is that since every stitch is different, you have to examine them individually. I usually look for the potential starting points first. Then, I get out my handy dandy doodle canvas and try a couple of different approaches. This is definitely something we should talk about more in The Stitcher’s Club, too. 😉
Have a terrific rest of your day…
XOXO!
Ellen